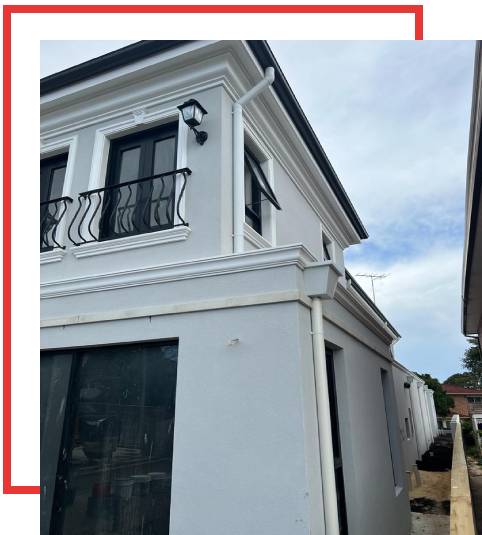
A Beginner's Guide to Plastering Your Walls
Plastering
is a time-honored technique used to create smooth, durable surfaces on walls
and ceilings. Whether you’re renovating an old home, creating a new one, or
simply updating a room, plastering is a great way to enhance the aesthetic and
functionality of your walls. If you’ve been considering plastering your walls
but don’t know where to begin, this beginner’s guide will walk you through the
process, providing you with essential tips and knowledge to get started.
What Is Plastering?
Plastering
involves the application of a mixture of lime, gypsum, or cement-based
materials onto the walls or ceilings to create a smooth, protective surface.
The plaster serves not only as a decorative feature but also as a protective
barrier against environmental factors like moisture, dust, and heat. When
applied correctly, plaster can create a flawless, polished finish that improves
the overall look and feel of a room.
There
are different types of plastering techniques, with the most common ones being plastering rendering and plastering for both internal and
external applications. When it comes to plastering services Sydney, you’ll find
professionals who specialize in both indoor and outdoor plaster finishes, with
services tailored to meet the needs of different types of surfaces.
Tools You’ll Need
Before
diving into plastering, it’s important to gather all the tools you will need.
Here’s a basic list of tools:
- Plastering
trowel
– used to apply and smooth plaster
- Hawk – a flat
platform for holding the plaster
- Plastering float – used to
smooth the surface once applied
- Mixing bucket – for mixing
plaster
- Sponge – for finishing
the surface
- Sandpaper – for smoothing
the surface before painting
It’s
crucial to choose high-quality tools to ensure the best results. Using
professional-grade equipment will make the job easier, and you’ll achieve a
more even finish.
Step-by-Step Guide to Plastering Your
Walls
1.
Prepare the Surface:
The first step in the plastering process is preparation. If you’re plastering
over an existing surface, such as drywall or painted walls, it’s essential to
clean the surface thoroughly. Any dirt, dust, or peeling paint should be removed,
and any cracks or holes should be patched with filler. If the wall is porous,
it may be necessary to apply a bonding agent to ensure the plaster adheres
well.
2.
Mix the Plaster:
Plaster comes in different forms: pre-mixed plaster or dry plaster powder that
requires mixing. Follow the manufacturer’s instructions on the packaging for
the best results. The plaster should have a smooth, creamy consistency, not too
thick or too runny.
3.
Apply the First Coat
Using your plastering trowel, scoop up the plaster and apply it to the wall in
a thin, even layer. Start from the bottom of the wall and work your way up,
applying the plaster in upward strokes. Don’t worry about achieving perfection
with this first coat; its purpose is to create a base layer for the following
coats. Allow this layer to dry before proceeding.
4.
Apply the Second Coat
Once the first coat has dried, it’s time to apply the second layer. Use the
trowel to spread another thin layer of plaster across the wall. Smooth it out
as much as possible, as this will reduce the amount of sanding required later.
After applying the second coat, leave it to set for a while.
5.
Smooth and Finish
Once the plaster begins to harden but is still slightly damp, use a plastering
float or trowel to smooth out the surface. You can use a sponge to help smooth
out any imperfections in the finish. If you want a glossy finish, you can use
fine-grit sandpaper to give it a polished look.
6.
Allow the Plaster to Dry Let the plaster dry for several hours, or overnight,
depending on the thickness of the application. Drying times can vary, so it’s
best to wait until it’s completely dry before you begin painting or applying
any further treatment.
When to Hire Professional Plastering
Services
While
plastering might seem like a simple DIY task, there are many instances where
it’s worth hiring professional plastering services in Sydney. For large
projects or for plastering external walls, such as plastering rendering, a professional plasterer will ensure
a smooth and uniform finish. They also have the expertise to handle complex
tasks, including repairing damaged plaster or creating decorative plasterwork.
If you want a flawless finish and long-lasting results, hiring experienced
professionals is always the best option.
DCR
Cement Rendering is one of the most trusted names in plastering and rendering
services across Sydney. Whether you need internal plastering or external
plastering rendering, their team offers expert craftsmanship and top-quality
materials to deliver superior results. With years of experience, DCR Cement
Rendering provides tailored solutions to meet all your plastering needs, ensuring
that your walls look stunning and remain durable over time.
Plastering
is an affordable and effective way to improve the look and feel of your walls,
whether you’re building, renovating, or simply refreshing a room. By following
these steps and using the right materials, you can achieve a
professional-looking finish. However, if you’re looking for long-lasting
results and high-quality craftsmanship, it’s always best to rely on expert
plastering services. Reach out to a trusted plastering provider like DCR Cement Rendering to ensure your
plastering project is completed with precision and care.
Other Sources: Swimming Pool Rendering, Bathroom Rendering Sydney, Foam Rendering


Comments
Post a Comment